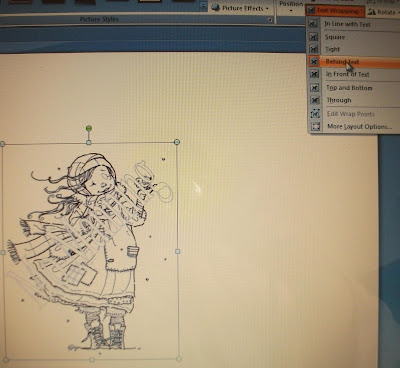
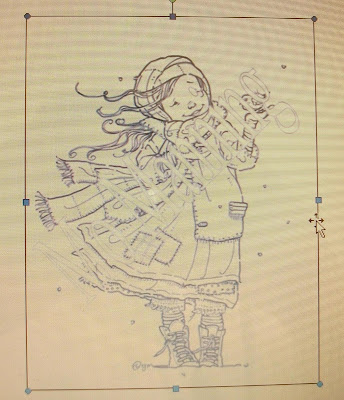
Hi everyone me again, see I didn't forget and as promised here the tutorial of how I faded my digis as used here, the only way your printer has of printing faded is to miss out parts, so your image will appear in line or pixels...there are a few other ways to do this, you can either just make the image brighter which fades it out but I found this also faded some of the finer lines of the image and lost some of the detail or you can print it on draft, I found this way looked really fuzzy, but both of these might work on your printer so give them a try, this is the way I did it though...I use MS Office Word for my printing but I would imagine all programmes have similar ways of doing the same things...right first add your image and click on text wrapping and behind text to make your image go behind what you add next, you can resize at this stage
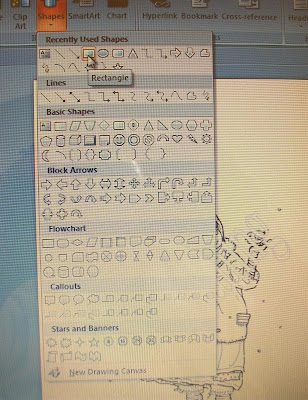
 then I went into Insert and Shapes and clicked on the square you of course can use any shape you need it doesn't have to be a square...click the page and add your square, resize it to what you need
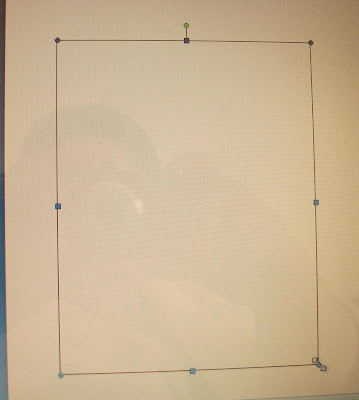
 then do the same as you did above format, text wrapping and this time make it in front of text so it is above your image covering it totally
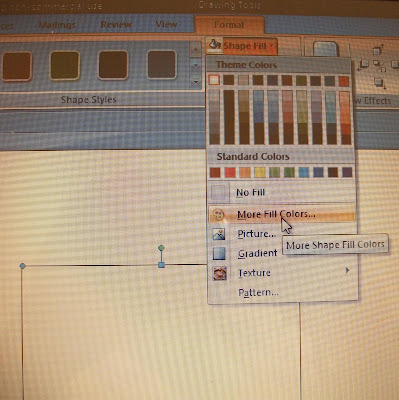
 click format again and choose white as your shape fill, then click more fill colours
 this brings up the colours box, at the bottom is the gauge for transparency, I chose 50% but you can make it darker or lighter of course
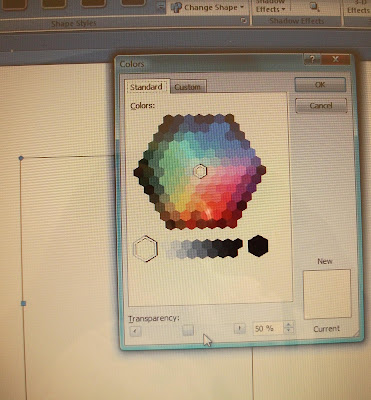 when you have finished choosing that you can choose if you want a shape outline to edge your box or shape or leave clear...then its just print as normal...hope this was easy to understand but if you need anymore info please just ask
Enjoy the rest of your Sunday everyone
Mina xxx
p.s. feel free to link to this post but remember dont lift or copy any of the images or info as it is copyrighted...thanks





13 comments:
That is amazing and so simple when you know how. Thanks for this, will have a great time playing with it.
That is so COOL!! I'll definitely be using that!! Thanks so much!!
Thanks Mina...I will give it a try!
xxx Margreet
Thanks Mina. Will try this.Hugs.
Thanks Mina for this brilliant tutorial... I'll definitely be giving this a go! Damn clever these computer thingy-me-bobs aren't they???? LOL
Hugs
Christine x
Thanks so Mina, this is fantastic. Lee x
brill mina can you put a link in your sidebar so we can jump to it as a reference. hugs Sue xx
I have put a link in my sidebar with the other tutorials xxx
Thanks for sharing the tutorial with us. I will have to give it a go now I know how it's done.
Happy Crafting!!! :) X X
My My, I never would have figured this out. Thank you so much for taking the time to explain. It was very helpful for the thumbnail pictures of the computer screen too.
Thank you again Mina
That is such a great tip!! thanks for sharing Mina
Jenni xx
Hi have been trying to figure this out on my own for ages with no luck so this is super . Off to try it out. Thankyou so much for taking the time to show us ! Kitty ;0)
Thank you for sharing Mina, not too sure that I will bother though :o)
Jackie xx
Post a Comment